During Bladder Augmentation Surgery, various surgical instruments are used to perform the procedure efficiently and safely. Here’s a list of common instruments:
step-by-step list of instruments
1. Preparation Phase:
Surgical Scalpels: For making the initial incision in the abdominal area.
Needle Holder: To securely hold needles for suturing.
2. Accessing the Bladder:
Surgical Scissors: To dissect and open up layers of tissue to reach the bladder.
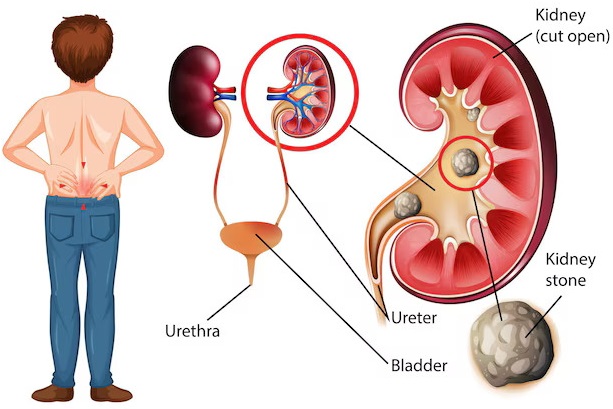
Bladder Retractors: Used to hold the bladder open for better access.
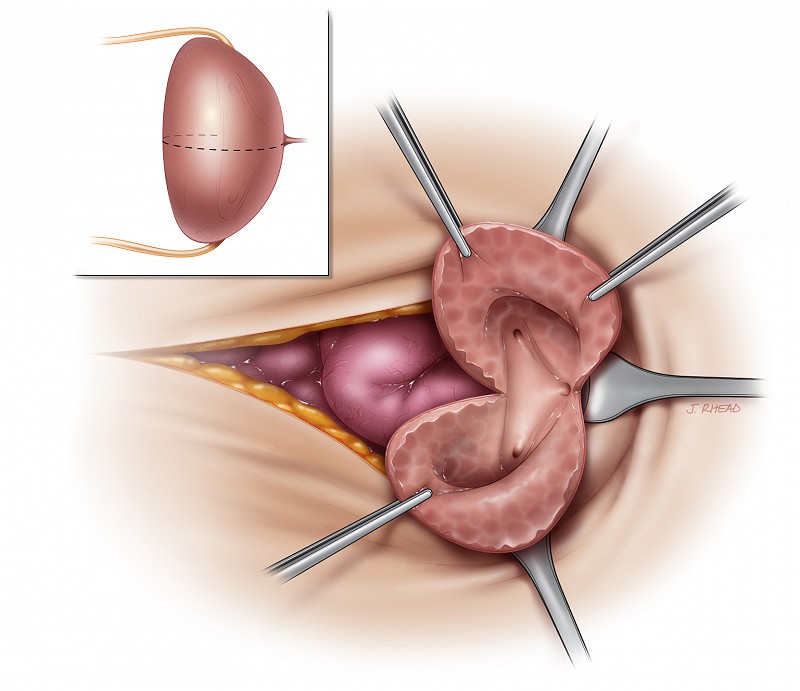
3. Harvesting Intestinal Tissue:
Intestinal Forceps: To clamp and hold the intestinal segment to be used for augmentation.
Bowel Clamp: To temporarily stop the blood flow to the portion of the intestine being removed.
Scissors or Electrocautery: To cut the section of the intestine.
4. Preparing and Attaching Intestinal Tissue to the Bladder:
Needle Holder and Suturing Instruments: For stitching the harvested segment of intestine to the bladder.
Surgical Scissors: For trimming any excess tissue.
Electrocautery (Diathermy): For coagulating small blood vessels to minimize bleeding.
5. Closing the Incision:
Sutures (Absorbable or Non-absorbable): To close the abdominal and bladder incisions.
Staplers: Occasionally used for closing the larger incisions in the bladder or abdominal wall.
6. Post-Operative Care:
Catheters: A catheter is inserted into the bladder for draining urine during recovery.
Drainage Tubes: May be used to prevent fluid buildup after surgery.
7. Final Inspection and Closure:
Sterile Drapes and Covers: To ensure a sterile environment during surgery.
Sutures or Staplers: To close the abdominal incision.
These instruments work together to ensure that the bladder augmentation procedure is successful and safe.